
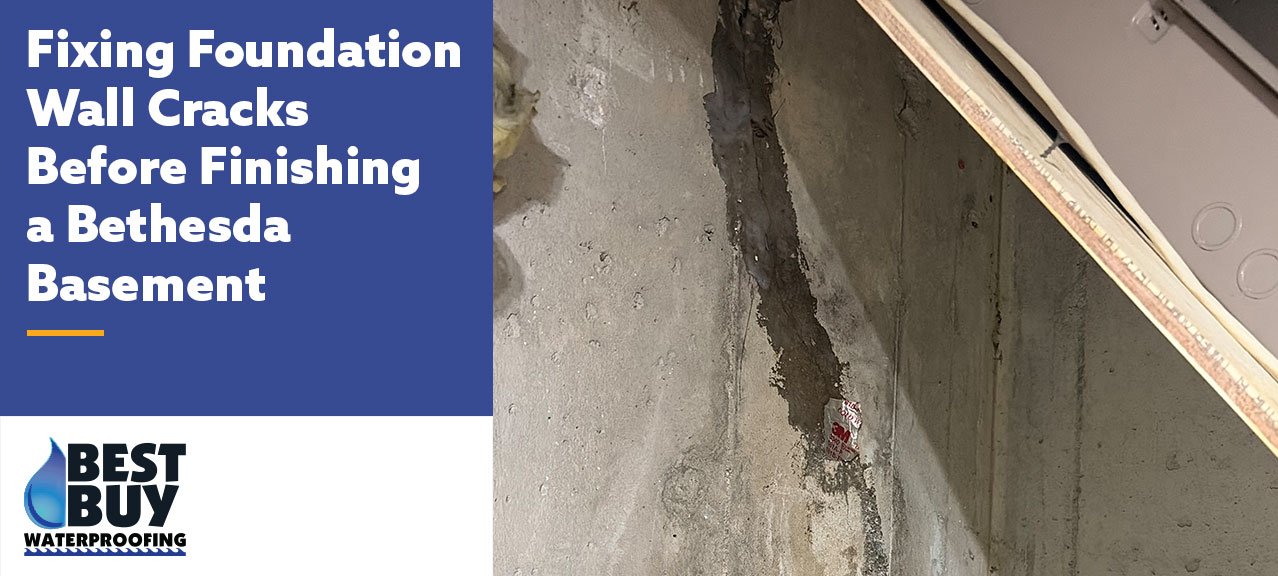
Planning a basement renovation is exciting. New flooring, fresh lighting, extra living space—it all adds up fast. What often gets pushed to the back of that list? Foundation wall cracks. And that delay can cost you far more than the renovation itself.
The cracks are easy to overlook. They sit in old concrete, out of sight and out of mind, while countertops and recessed lighting feel like real progress. But covering a crack doesn’t fix it. Any foundation crack needs a proper evaluation before finishing work begins—because water doesn’t care what’s in front of it. Bethesda foundation wall crack repair after a basement is already finished means tearing out new drywall, insulation, and framing just to reach the source.
That’s what this article is here to help you avoid. Best Buy Waterproofing will cover why foundation crack repair comes before any renovation work, how to tell the difference between a structural crack and a shrinkage crack, and what a proper pre-finishing assessment actually looks like. We’ll also walk through repair methods suited to Bethesda Maryland clay soil conditions and how to fit foundation work into your finishing timeline without throwing the whole project off schedule.
Quick Answer: Why Crack Repair Comes Before Finishing
Here’s the short version: every crack in a poured concrete foundation wall can leak. Not might. Every one of them. The only real variable is timing.
Tackling foundation crack repair before renovation means cracks are accessible, visible, and fixable without touching any finished materials. Wait until after the walls go up, and the math changes fast. Fixing foundation problems behind finished drywall, insulation, and framing typically costs two to three times more than addressing them before construction starts—because now you’re paying for demolition on top of the actual repair.
There’s more at stake than water, too. Foundation wall cracks open pathways for moisture, radon gas, and pests. Cracks 1/8-inch or wider make it even easier for these problems to take hold. When that happens behind finished walls, the damage builds quietly—mold spreads, materials deteriorate, and you don’t see any of it until the problem is already serious.
Repairing visible cracks is always easier and less expensive than chasing them after foundation walls are covered. Best Buy Waterproofing recommends a foundation wall crack inspection before any basement finishing Bethesda MD project gets underway. It’s the step that protects everything that comes after it.
Why This Step Gets Skipped So Often
Foundation crack repair in Bethesda is easy to deprioritize. It doesn’t show up in design boards or finish samples. The crack sits in plain concrete while everything else on the renovation list feels more satisfying to check off.
A hairline crack with no visible water often looks cosmetic
Hairline cracks less than 1/16 inch wide are extremely common, and most homeowners assume they’re harmless. Concrete cracks as it cures and shrinks—that’s normal. The problem is that “normal” can look a lot like “nothing to worry about”. A crack that’s stayed dry through several rainy seasons can give a false sense of security. Dormant during a dry inspection doesn’t mean dormant forever.
Renovation timelines and budgets that prioritize visible upgrades
Basement finishing budgets go toward what people will actually see—flooring, lighting, trim, paint. Foundation crack repair doesn’t feel like an upgrade. It feels like paying to fix something that should have been right to begin with. And if your finishing contractor isn’t asking about foundation condition, the subject may never come up at all.
Why a crack that’s dry during inspection can become active later
A dry crack today isn’t a promise. In Bethesda, the clay-heavy soil shifts constantly with the seasons. Summer heat dries the soil out and pulls it away from your foundation, widening gaps. Winter moisture causes that same soil to swell and push back. Add a change in exterior drainage or a stretch of heavy rainfall, and a crack that sat dormant for years can suddenly become a water pathway. The crack didn’t change—the conditions around it did.
What Happens If You Finish Over an Unaddressed Crack
Here’s the scenario nobody wants: you’ve just wrapped up a basement renovation—new drywall, fresh carpet, recessed lighting—and a few months later you smell something musty. Then you notice a soft spot in the wall. By the time you trace it back to the source, the damage has been building behind your finished walls for months.
That’s what finishing over an unaddressed crack looks like in practice.
Water intrusion behind finished walls can go unnoticed for a long time
Water entering through an unrepaired crack doesn’t pool neatly where you can find it. It travels behind drywall, paneling, insulation, and flooring—and the spot where moisture eventually shows up may be several feet from where it actually came in. Older materials like plaster-over-lath walls and certain insulation types absorb moisture without any immediate visible signs. A slow, steady leak can fully saturate a wall cavity and remain completely undetected for extended periods. You won’t know until the damage is already done.
Why trapped moisture behind a finished wall is harder to diagnose
An unfinished basement is straightforward to inspect—you can see every inch of the foundation wall. A finished basement is a different problem. Drywall and carpeting create enclosed cavities that hold moisture against cool concrete. Without airflow, that dampness doesn’t dry out. Mold can spread through an entire wall cavity before a single surface indicator appears. Once the walls are covered, visual inspection is no longer an option.
The difference in repair scope: open basement versus finished walls
An unfinished basement gives you direct access to every crack. A finished basement requires removing drywall, insulation, and framing just to get back to the wall surface. That’s not a minor inconvenience—it means additional labor, additional materials, and a renovation you’ve already paid for turned into a demolition project.
Addressing the crack before finishing work begins costs a fraction of what it costs to undo a finished space and start over.
Structural vs. Non-Structural Foundation Cracks
Not every crack you find in a foundation wall is a crisis—but every crack deserves a closer look before any finishing work begins. The difference between structural and non-structural cracks determines what kind of repair is needed and whether injection alone will do the job or whether your foundation needs stabilization first.
Non-structural cracks are the more common of the two. They typically run vertically, measure 1/8 inch or less in width, and show no displacement—meaning both sides of the crack sit flush with each other. These form as concrete loses moisture and contracts during the curing process, creating internal tensile stress. They look harmless, and structurally speaking, they often are. But looks can be misleading. Even a thin shrinkage crack allows water infiltration and needs to be sealed before walls go up.
Structural cracks are a different story. These signal active movement in the foundation. Horizontal cracks point to lateral soil pressure pushing walls inward. A stair-step pattern in block foundations suggests differential settlement, where one section of the foundation has shifted independently from another. Any crack wider than 1/4 inch, any crack where one side sits higher or lower than the other, or a crack paired with a bowing wall—those require immediate professional evaluation.
Why this distinction determines whether injection repair is sufficient
The repair method follows directly from the crack type. Epoxy injection works well on stable, dry cracks—it bonds the concrete back together and restores structural strength. Polyurethane injection handles active leaks, expanding to fill voids and stopping water in its tracks.
Here’s the important part: injection only works when the foundation itself is stable. If walls are bowing, settling, or actively moving, sealing the crack without addressing the movement is treating the symptom and ignoring the cause. Structural reinforcement has to come first—then crack repair.
That’s why knowing which type of crack you’re dealing with isn’t just a technical detail. It shapes the entire repair plan before your Bethesda basement finishing project moves forward.
Common Causes of Foundation Wall Cracks in Bethesda Homes
Foundation problems don’t appear out of nowhere. They stem from pressure, movement, and moisture working against your foundation over time. Knowing what causes these cracks helps you understand the risk factors specific to Bethesda Maryland clay soil conditions—and why some homes are more vulnerable than others.
Hydrostatic pressure from saturated soil
Water weighs approximately 62.4 pounds per cubic foot. When gutters are clogged or grading slopes toward the house, that water saturates the soil surrounding your foundation and pushes inward against basement walls. The deeper the basement, the more pressure builds. Left uncorrected, that saturated soil expands and the resulting pressure leads to horizontal cracking, bowing walls, and active leaks.
Normal concrete shrinkage and curing cracks
Concrete is mixed with more water than the curing process actually needs. As the excess evaporates, concrete loses mass and shrinks—creating microscopic voids that can develop into visible cracks. These shrinkage cracks typically show up as short, vertical hairline fissures less than 1/8 inch wide. Most form within the first 24 to 72 hours after pouring, though drying shrinkage can continue for weeks or even months afterward.
Soil movement and settlement common to clay content
Clay soil expands up to 15% in volume when saturated with water, then contracts significantly when it dries out. Roughly 60% of American homes sit on soils with clay content. Here in Bethesda, that clay-heavy soil creates a continuous push-and-pull cycle against your foundation walls. Over time, this causes uneven settlement and diagonal cracking that gets more pronounced with each passing season.
Poor or deteriorated exterior drainage
Downspouts that discharge too close to the foundation—or any grading that slopes back toward the house—concentrate water right where you don’t want it. That standing, saturating water triggers soil expansion, slowly erodes the material supporting your foundation, and builds hydrostatic pressure all at once. It’s not one big event that causes the damage. It’s the slow, steady accumulation that eventually shows up as a crack you can’t ignore.
How Foundation Wall Cracks Are Repaired
Once a crack is evaluated and the right repair method is identified, the actual fix happens from the inside. A repair material is injected directly into the void under pressure, sealing the crack without excavating the exterior. Two materials are used for poured concrete foundation crack repair. Which one gets used depends on what the crack is doing.
Polyurethane injection versus epoxy injection
Epoxy is a rigid, two-part resin that bonds cracked concrete back together with high compressive and tensile strength. Think of it as a permanent weld inside the wall. Polyurethane works differently — it’s a flexible, expanding foam that reacts with moisture and expands 2 to 40 times its original volume to fill voids within the concrete. Each material has its place. Neither one is universally better.
Why the repair method depends on whether the crack is leaking
Here’s where the distinction matters most. Epoxy needs a dry surface to cure properly — it cannot be used on an actively leaking crack because it requires containment until it sets. Polyurethane, on the other hand, uses water as a catalyst. It works on wet substrates and can stop a gushing leak quickly because it cures fast.
Dry, stable crack? Epoxy. Active leak? Polyurethane. Getting this choice wrong can mean a repair that fails within a season.
Why addressing the water source matters alongside the crack itself
Sealing the crack is only part of the job. If downspouts are discharging right beside your foundation or the grading slopes back toward your home, the pressure that caused the crack is still building. The crack is just where it showed up — not the root problem. Fix the crack and correct the conditions around it. That’s what produces long-term results.
What a Pre-Finishing Foundation Assessment Looks Like
Knowing you need a foundation inspection is one thing. Knowing what actually happens during one is another. Here’s how a professional foundation wall crack inspection works before basement finishing in Bethesda, MD—and why each step matters.
Every visible crack gets evaluated
Width, pattern, displacement, and any history of movement—each crack tells a story. Cracks wider than 1/8 inch in poured concrete walls get flagged for immediate attention. Diagonal cracks at window corners or stair-step patterns in block walls point toward settlement that goes beyond surface-level sealing.
Signs of past or active water intrusion
Surfaces can look dry during an inspection and still show evidence of moisture movement. Efflorescence—that white, chalky powder you sometimes see on concrete—water staining, damp spots, and musty odors all indicate water has been working its way through the wall. These signs matter even when there’s no visible leak on inspection day.
Exterior grading and drainage get checked too
Proper grading should slope a minimum of 1/2 inch per foot away from your foundation for at least 10 feet. The assessment looks for negative slopes, settled soil, downspouts discharging too close to the wall, and whether neighboring property drainage is pushing water toward your foundation.
The right repair method gets matched to each crack
Not every crack gets the same treatment. Stable, non-leaking cracks may receive epoxy injection, while active leaks call for polyurethane. The decision comes down to what the crack is doing—not just what it looks like.
Repairs are completed and drainage is corrected
Both the symptom and the cause get addressed together. Sealing a crack without correcting the drainage conditions that stressed it is only half the job.
A final walkthrough confirms the foundation is ready
Before framing begins, repairs are verified and documented. You’ll know exactly what was found, what was fixed, and that your foundation is ready for what comes next.
Signs You Should Pause a Basement Finishing Project
Not every basement is ready to be finished. Before your contractor starts framing, there are warning signs that should stop the project in its tracks. Catching these early protects your budget. Missing them turns a renovation into a recovery.
Any visible crack that hasn’t been evaluated
The average home has between two and eight foundation cracks. Each one deserves a professional look before anything goes up in front of it. Cracks don’t heal on their own, and they will eventually leak. Cracks wider than 1/8 inch need immediate attention—don’t let a finishing timeline rush that conversation.
Past water staining or efflorescence near foundation walls
See white, chalky powder on your concrete walls? That’s efflorescence, and it means moisture has been moving through your foundation. Water stains, peeling paint, and musty odors near the base of your walls tell the same story. Surfaces can look dry on inspection day and still have an active moisture problem underneath.
A crack that has changed in width or appearance
Measure your cracks. Photograph them. Check back in 90 days. Any crack that widens, extends, or shifts out of plane over a three-month period is telling you something important—and that something requires structural evaluation before finishing begins.
No drainage system despite a known moisture history
If your home has had water in the basement before, drainage correction comes first. Finishing over a moisture problem without addressing what caused it is the most expensive shortcut a homeowner can take.
A finishing contractor who hasn’t asked about your foundation
This one matters. A contractor focused only on what the finished space will look like may not bring up foundation concerns at all. Ask directly. If they don’t have a clear answer about what’s behind your walls, that’s worth paying attention to.
Why This Matters Even for Homes With No Known Water History
“My basement has been dry for 30 years.” We hear this often. And we understand why that history feels reassuring. But a dry past doesn’t guarantee a dry future—especially once you close everything in behind finished walls.
A foundation crack can exist for years without an obvious leak
Concrete is porous. Even when a wall looks completely solid, moisture moves through it slowly and quietly. You won’t always see puddles. What you might notice instead—eventually—are musty odors, peeling paint, or that white chalky powder called efflorescence. These are signs moisture has been passing through long before anyone noticed.
A crack that stayed dormant through years of rainy seasons can activate when hydrostatic pressure conditions shift. The crack didn’t change. The conditions around it did.
A dry history isn’t the same as a dry future
Here’s something worth sitting with: a foundation crack that stayed dry for years can start leaking without warning. The crack itself may look exactly the same. What changed is the water volume and pressure building outside the wall—until groundwater found its way through.
All foundation cracks carry the potential to leak. No water visible today doesn’t mean the crack will stay dry once your renovation is complete.
Finishing a basement changes more than the appearance
An unfinished basement breathes. Air moves, humidity escapes, and you can spot a problem before it gets serious. Once you frame walls, install insulation, and hang drywall, that changes entirely.
Finished spaces create enclosed cavities that trap moisture against cool foundation walls. A basement that felt perfectly dry before finishing can develop real moisture problems once everything is sealed in. The natural airflow that kept humidity in check is simply gone.
That’s why a foundation crack evaluation matters even when your basement has never shown a drop of water. It’s not about what’s happened—it’s about protecting what you’re about to build.
How Best Buy Waterproofing Prepares Bethesda Basements for Finishing
Getting your basement ready for renovation starts with knowing exactly what you’re working with. At Best Buy Waterproofing, we don’t just walk in with a flashlight and a general opinion. Every pre-finishing assessment is thorough, documented, and built around what your foundation actually needs before framing begins.
What our assessment actually covers
Our team walks the full perimeter of your basement using a crack comparator gauge, pin-type moisture meter, and laser level readings across foundation wall tops to check for inward lean. That combination of hands-on measurement and photographic documentation gives us a complete picture—not just a surface-level look.
The inspection covers five core areas:
- Foundation wall condition and crack evaluation
- Bowing or lateral displacement
- Floor slab cracking and settlement
- Moisture and water intrusion patterns
- Drainage system functionality
An unfinished basement exposes 90 to 100 percent of wall surface for direct evaluation. Once walls go up, visibility drops to 20 or 30 percent. That’s exactly why this assessment happens before your finishing contractor picks up a stud.
Separating real problems from cosmetic ones
Not every crack is a crisis. Our job on every foundation wall crack inspection is to tell the difference—because recommending repairs you don’t need costs you money without solving anything. We give you a straight answer on what requires attention and what can be monitored.
Ready to get started?
Contact Best Buy Waterproofing before framing begins. A Bethesda foundation crack repair assessment now protects everything you’re about to build. Schedule your inspection today—no pressure, just answers.
Don’t wait until the walls are up. Contact Best Buy Waterproofing today and schedule your foundation assessment before your basement finishing project begins.