
Hardwood floors don’t just warp on their own. Most of the time, the real culprit is right below your feet—hiding in your crawl space.
If you’ve noticed your floors cupping, buckling, or feeling soft in spots, moisture is likely the cause. Subfloor moisture above 13% can trigger cupping and buckling, and vented crawl spaces in the Fairfax area regularly hit between 19% and 25% moisture levels during summer months. That’s a wide gap from where things need to be—and your hardwood floors feel every bit of it.
Fairfax’s humid climate makes this worse. An uncontrolled crawl space doesn’t stay dry on its own. It absorbs outdoor humidity, cycles it upward through your subfloor, and keeps your hardwood floors under constant stress season after season.
The good news? This is a solvable problem.
Here, you’ll learn how moisture travels from your crawl space into your floors, what early warning signs to watch for, and how crawl space encapsulation Fairfax—paired with proper dehumidification and a sealed vapor barrier—protects your hardwood floors for the long haul.
How Crawl Space Moisture Damages Hardwood Floors
Crawl space humidity doesn’t stay put. It moves upward—following vapor drive—and it often ends up exactly where you don’t want it: absorbed into your hardwood floors. Understanding how that happens makes it a lot easier to stop it.
Why Fairfax humidity and poor soil drainage can keep crawl spaces damp
Here’s what’s happening in a vented crawl space during a Fairfax summer. Warm, humid outdoor air flows in through the vents, hits the cooler crawl space surfaces, and the relative humidity spikes—often leading to condensation on joists, ductwork, and your subfloor. Add poor grading or inadequate drainage around the foundation, and water pools near the house and seeps in from the ground as well.
What makes this especially concerning is that up to 50% of the air circulating through your living space originates in the crawl space below. A damp crawl space isn’t just a floor problem. It’s an air quality problem for your entire home.
Older unsealed crawl spaces and newer homes with incomplete vapor barriers
Older homes with open, vented crawl spaces rarely have any vapor barrier at all. Bare soil releases moisture continuously—straight up into your subfloor.
Newer construction isn’t automatically safer. In one documented case, a 6-mil polyethylene vapor retarder was installed over the crawl space floor but stopped 1 to 3 feet short of the perimeter walls. That gap was enough to let subsoil moisture pour in unchecked. A code-compliant vapor retarder needs to:
- Cover the ground completely
- Overlap seams by at least 6 inches
- Extend up the foundation walls, sealed and attached
Miss any one of those steps and the whole system is compromised.
How moisture reaches the subfloor and causes uneven wood expansion
Wood is hygroscopic—it constantly absorbs and releases moisture based on the air around it. As crawl space humidity rises, wood moisture content follows. At 50% relative humidity, wood typically sits around 10% MC. Push that to 70% RH and it climbs to roughly 13% MC. Once crawl space readings exceed 60% RH, hardwood floors are already at risk—and so is mold.
The damage comes from uneven absorption. Moisture enters faster through the bottom of a board than the top, causing the bottom to expand while the top stays drier. That internal stress is what produces cupping. In one documented case, subfloor moisture averaged 16.9% MC with crawl space humidity at 69.7% RH—conditions that made cupping unavoidable. Left unaddressed long enough, moisture levels near 20% MC invite wood decay as well, and the structural damage compounds from there.
Signs Your Hardwood Floors May Have Crawl Space Moisture Damage
Catching this early makes all the difference. Fairfax homeowners dealing with crawl space moisture often tell us the same thing—they kept refinishing the same boards, and the damage kept coming back. That’s because refinishing a floor doesn’t fix what’s happening underneath it.
What cupping, warping, and buckling look like
Cupping is when a board’s edges rise higher than its center. Run your hand across the floor and it feels ridged or scalloped instead of flat. Buckling is worse—the board actually lifts away from the subfloor entirely. Both are direct responses to moisture imbalance between the crawl space below and the living space above.
Flooring contractors often see this alongside mold on baseboards and a persistent musty smell rising from below. And these problems don’t wait for old homes. One documented case involved a 1940s pier-and-beam home where the hardwood floor buckled and rose nearly 4 inches in spots after decades of being perfectly stable. Cupping and warping rarely fix themselves—they get worse the longer the moisture source stays active.
Seasonal gaps and floor damage concentrated above the crawl space
Not every gap in your floor is cause for alarm. Wood naturally shrinks in winter when indoor air dries out, and swells again when summer humidity returns. Small gaps that open and close with the seasons are considered normal.
What’s not normal is when those gaps widen permanently, or when boards compress so tightly against each other that the compression damage stays—like a dent that never fully pops back out. Floors that feel soft or spongy underfoot are another red flag. Those soft spots almost always sit directly above the joists and subfloor sections taking on the most moisture.
Musty smells, condensation, and visible crawl space dampness
That musty smell in your basement or lower level? It usually shows up long before any visible cupping does. It comes from gases released as mold breaks down damp wood—and your nose picks it up before your eyes ever will.
If you’re able to access your crawl space, here’s what to look for:
- Water droplets or wet streaks on your foundation walls
- Moisture beading on cold water pipes
- Insulation that looks damp, discolored, or sagging from the joists
A smell that gets worse right after rain is a strong signal of active crawl space moisture—not a one-time issue.
How moisture readings help distinguish crawl space problems from leaks
Two tools tell you a lot: a hygrometer measures the relative humidity in your crawl space air, while a wood moisture meter measures what’s actually held inside your joists and subfloor.
Here’s a simple breakdown of what the numbers mean:
- Below 50% RH — generally healthy
- 50–60% RH — worth monitoring
- Above 60% RH — mold growth and elevated wood moisture become real concerns
Most unmanaged crawl spaces run between 70 and 90% RH during summer months. A properly encapsulated crawl space, by contrast, holds at or below 55% RH year-round.
One more thing worth knowing: if a pipe feels wet on the outside but there’s no active drip, that’s condensation—not a leak. It’s a small distinction, but an important one. It tells you whether you need a plumber or a crawl space encapsulation team.
How Crawl Space Encapsulation Protects Your Floors: Step by Step
At Best Buy Waterproofing, we treat crawl space encapsulation for hardwood floors in Fairfax as a sequence, not a single product. Every step builds on the last—and skipping one puts the whole system at risk.
1. Inspect the crawl space and address leaks, drainage, and damaged wood
We start with a thorough walkthrough—checking liners, seams, piers, and rim joists for gaps, along with subfloor staining and baseline moisture readings. Any standing water, active leaks, or wood rot gets resolved before we seal anything. Sealing over an existing problem only traps it.
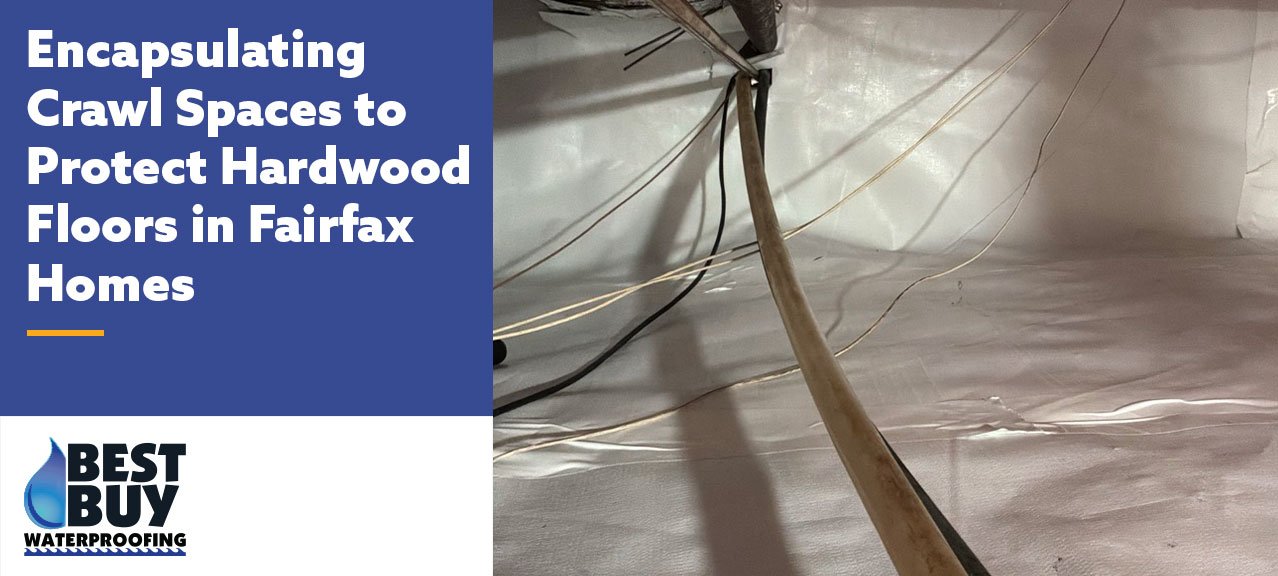
2. Install a sealed vapor barrier over the ground and foundation walls
A Class I vapor barrier—10 to 20 mil—covers the ground and extends up the foundation walls at least 6 inches. Seams overlap 6 to 12 inches and get taped. This is where we stop crawl space moisture hardwood cupping at its source, before humidity ever reaches your subfloor.
3. Seal vents and air leaks as part of a code-compliant crawl space plan
Closing vents and sealing rim joists, access doors, and all penetrations cuts off the path humid outdoor air uses to reach your subfloor. This is one of the most overlooked steps—and one of the most important.
4. Install crawl space dehumidification sized for the space
A sealed crawl space still needs mechanical drying. We size every dehumidifier to the square footage, humidity load, and layout of your specific space—not just a rough floor area estimate. Getting this right is what keeps humidity stable year-round.
5. Check vapor barrier seals and track humidity and wood moisture
Installation isn’t the finish line. Regular checks of seams, humidity levels, and wood moisture content keep the system working the way it should—protecting against hardwood floor warping crawl space conditions long after the job is done.
Floor Repairs, Common Questions, and Help in Fairfax
We hear the same questions from Fairfax homeowners once they learn crawl space moisture is behind their floor damage. Here’s what you need to know before deciding on next steps.
Will encapsulation fix hardwood floors that are already cupped?
Often, yes—but give it time. Once crawl space humidity drops, cupped boards frequently flatten on their own over several months. How much they recover depends on the wood species, the finish, and how long the moisture was sitting there. Results vary, so there’s no one-size-fits-all answer.
When is the floor dry and stable enough for refinishing or replacement?
Don’t rush this step. Wait until the moisture content differential between the top and bottom of each board falls within 1%, with overall readings landing between 6% and 9%. Sanding or refinishing before the wood reaches that equilibrium risks undoing the work you just paid for.
Could sagging floors point to something more serious?
Soft, bouncy floors above a crawl space don’t always mean surface cupping. They can signal weakened joists underneath. Our sagging floors guide walks through joist sistering and beam supports for homes dealing with that issue.
How long does crawl space encapsulation take?
Most projects run three to five days, depending on the size of the space and what we find once we’re in there.
What affects the cost?
Several factors come into play—crawl space size, ceiling clearance, how easy it is to access, standing water, existing mold, and whether any structural repairs are needed. That’s why every estimate starts with a thorough inspection, not a flat number.
How Best Buy Waterproofing can help
Our Fairfax team takes a close look at your vapor barrier, dehumidification setup, insulation, and framing—then puts together a plan built around what your home actually needs. No guesswork, no one-size-fits-all approach.
Contact us today for a free inspection. No pressure, just answers.
Conclusion
Cupping, warping, and soft spots in your hardwood floors aren’t random. They’re signals—and they’re almost always pointing down to your crawl space.
A sealed vapor barrier paired with proper dehumidification addresses the actual source of the problem, not just the surface. Once humidity levels stabilize, your floors have a real chance to recover—and stay that way year after year.
At Best Buy Waterproofing, we build every crawl space plan around what your home actually needs. No one-size-fits-all approach. No guesswork. Just a thorough inspection and an honest conversation about what’s going on beneath your floors.
Don’t let moisture keep winning. Reach out to our Fairfax team today and take the first step toward protecting your hardwood floors for good.